Output
Contents
Outputting to the screen
First, be aware of the MSDOS memory layout
Outputting in Textmode (80x25)
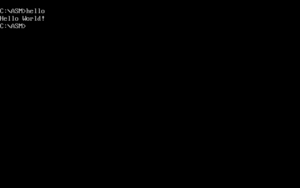
Hello World / High Level function
Here's an obligatory "Hello World" program in text mode, using a "high level" MS-DOS function. With a small optimization already included (using XCHG BP,AX instead of MOV AH,09h), this snippet is 20 bytes in size.
org 100h			; we start at CS:100h
xchg 	bp,ax		; already a trick, puts 09h into AH
mov		dx,text		; DX expects the adress of a $ terminated string
int 	21h			; call the DOS function (AH = 09h)
ret					; quit
text:
db 'Hello World!$'
Low level access
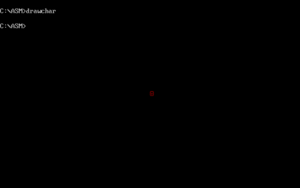
The following three snippets showcase how to draw a red smiley in three different ways. All example snippets are meant to be standalone programs, starting with the first instruction and nothing before it. The target coordinate (40,12) is about the middle of the screen. We need a multiplier 2 since one char needs two bytes in memory (char and color is a byte each). The high byte 0x04 means red (4) on black (0) while the 0x01 is the first ASCII char - a smiley.
push 0xb800
pop ds
mov bx,(80*12+40)*2
mov ax, 0x0401
mov [bx],ax
ret
push 0xb800
pop es
mov di,(80*12+40)*2
mov ax, 0x0401
stosw
ret
push ss
push 0xb800
pop ss
mov sp,(80*12+40)*2
mov ax, 0x0401
push ax
pop ss
int 0x20
You might notice that the push <word> + pop seg_reg combination is always the same and occupies four bytes alltogether. If correct alignment is not important to you and you really just want any pointer to the screen, there is another way to get a valid one:
les bx,[si]
nop
stosb
That's also four bytes, but it already has the stosb opcode (for putting something onto the screen) integrated and even one slot free for another one-byte-instruction. It works because SI initially points to the start of our code, and stosb has the hexadecimal representation of 0AAh. After the first command, the segment register ES contains the value 0AA90h. If you repeatedly write something to the screen with stosb you will eventually reach the 0B800h segment and chars will appear on the screen. With a careful selection of the free one-byte-opcode you can also reintroduce some alignment. This works also with the stosw opcode 0ABh.
Alternative high level functions
Besides the direct way of accessing memory there are also other ways of bringing char to the screen (f.e)
Outputting in mode 13h (320x200)
Basic pixel output
The videomemory for mode 13h is located at segment 0xA000, so you need to assign this value to a segment register. Also, after the start of your program you are normally still in textmode, so you need to switch to the videomode. The following snippet does both:
mov al,0x13
int 0x10     ; AH = 0 means : set video mode to AL = 0x13 (320 x 200 pixels in 256 colors)
push 0xA000  ; put value on the stack
pop es       ; pop the top stack value into segment register ES
You're free to use any of the segment register / opcode combinations to write to the screen
-
ES(stosb) -
DS(mov) -
SS(push)
Let's add some code that actually draws something on the screen, the following program occupies 23 bytes and draws a fullscreen XOR texture
mov al,0x13
int 0x10
push 0xa000
pop es
X: cwd			; "clear" DX (if AH < 0x7F)
mov ax,di		; get screen position into AX
mov bx,320		; get screen width into BX
div bx			; divide, to get row and column
xor ax,dx		; the famous XOR pattern
and al,32+8		; a more interesting variation of it
stosb			; finally, draw to the screen
jmp short X		; rinse and repeat
Note that there is a different way of preparing the segment register, instead of :
push 0xa000
pop es
you can also do :
mov ah,0xA0
mov es,ax
both variations occupy 4 bytes, but the latter is executable on processor architectures where push <word> is not available.
Alternative way of pixel plotting and optimization
Now let's optimize on the snippet. First, we can adapt the "LES" trick from the textmode section. We just exchange
push 0xa000
pop es
with:
les bx,[bx]
to save two bytes. This works because BX is 0x0000 at start and thus, accesses the region before our code, which is called Program Segment Prefix. The two bytes that are put into the segment register ES are bytes 2 and 3 = "Segment of the first byte beyond the memory allocated to the program" which is usually 0x9FFF. That is just off by one to our desired 0xA000. Unfortunately that means a 16 pixel offset, so if screen alignment means something to you, you can't use this optimization. Also, said two bytes are not always 0x9FFF; for example, if resident programs are above the "memory allocated to the program" (FreeDos), their content is overwritten if we take their base as our video memory base.
Second, we can use an alternative way of putting pixels to the screen, subfunction AH = 0x0C of int 0x10. Also, instead of constructing row and column from the screen pointer, we can use some interesting properties of the screenwidth regarding logical operations. This results in the following 16 byte program:
cwd             ; "clear" DX for perfect alignment
mov al,0x13
X: int 0x10		; set video mode AND draw pixel
inc cx			; increment column
mov ax,cx		; get column in AH
xor al,ah		; the famous XOR pattern
mov ah,0x0C		; set subfunction "set pixel" for int 0x10
and al,32+8		; a more interesting variation of it
jmp short X		; rinse and repeat
The first optimization is the double usage of the same "int 0x10" as setting the videomode and drawing the pixel. The subfunction AH = 0x0C expects row and column in DX and CX. Since the screenwidth is 320, which is 5 * 64, we can ignore the row and just works with the column, if we use logical operations and just use bit 0-6 of the result. The subfunction AH = 0x0C allows for unbounded column values in CX (up to 65535) and correctly "wraps" it internally without an error.
The major drawback of the "subfunction AH = 0x0C" approach is performance loss. While DosBox and many emulators perform just fine, real hardware will draw much much slower based on the Video BIOS.
Basic animation and user interaction
Now let's add the convenient check for the ESC key and also add a simple animation. The DI register is used as frame counter and incremented after the pixel counter CX ran through all 65536 values via LOOP. This frame counter is then added to the column. The resulting program is now 25 bytes in size :
cwd             	; "clear" DX for perfect alignment
mov 	al,0x13
X: 		int 0x10	; set video mode AND draw pixel
mov 	ax,cx		; get column in AH
add		ax,di		; offset by framecounter
xor 	al,ah		; the famous XOR pattern
and 	al,32+8		; a more interesting variation of it
mov 	ah,0x0C		; set subfunction "set pixel" for int 0x10
loop 	X			; loop 65536 times
inc 	di			; increment framecounter
in 		al,0x60		; check keyboard ...
dec 	al			; ... for ESC
jnz 	X			; rinse and repeat
ret					; quit program
( ↑ This example is the blueprint in the FPU Basics Section.)
Producing sound
MIDI notes
Creating sounds with MIDI requires a bit more preparation, but once you're familiar with it, it's even simpler than PC Speaker sound, because you basically don't have to create the sound, you just have to trigger it. For the start, you have to know, that there is a lot of different instruments and a defined way of communication. Imagine the MIDI interface like a keyboard, you tell it which button/key you want to press, which knob to twist, and sometimes, how hard. Per default, the active instrument is the Acoustic Grand Piano.
Single piano note
Let's start of with a simple example, playing a single note on the piano :
mov 	al,	3Fh		;	set UART mode - command
mov 	dx,	331h	;	MIDI Control Port
out 	dx,	al 		;	send !
dec 	dx			;	MIDI Data Port ( = 330h )
mov 	al,	90h		;	send note on channel ZERO - command
out 	dx,	al		;	send !
mov 	al,	56h		;	data byte 1 : KEY = 56h
out 	dx,	al		; 	send !
mov 	al,	67h		;	data byte 2 : VOLUME = 67h
out 	dx,	al		;	send !
ret					; 	quit
In short: you turn your keyboard on (switching to UART mode), then press a KEY with a certain VOLUME on channel ZERO, then exit. Besides switching to UART mode, all this communication uses the port 330h. This example will work on DosBox but not on Windows XP NTVDM: for still unclear reasons, the NTVDM emulation delays the note until it receives a second one. The simplest way of at least hearing something is to repeatedly play notes, like in the following example :
Repeated piano notes
mov 	al,	3Fh			;	set UART mode - command
mov 	dx,	331h		;	MIDI Control Port
out 	dx,	al 			;	send !
dec 	dx				;	MIDI Data Port ( = 330h )
main:
mov 	al,	90h			;	send note on channel 0 - command
out 	dx,	al			;	send !
mov 	al,	56h			;	data byte 1 : KEY = 56h
out 	dx,	al			; 	send !
mov 	al,	67h			;	data byte 2 : VOLUME = 67h
out 	dx,	al			;	send !
_wait:
mov 	al,	[fs:0x46c]	;	read timer
test 	al,	3			;	skip 3 values
jnz 	_wait			;
inc 	byte [fs:0x46c]	; 	inc manually to prevent retrigger
in 		al,	0x60		;	check for ESC
dec 	al				;
jnz 	main			;	no? repeat
ret						;	quit
↑ This is the previous example, enriched with synchronizing against the timer and checking for the ESC key. It works on both DosBox and Windows XP NTVDM and plays a note on the Piano repeatedly.
Repeated notes of other instruments
While hitting one key repeatedly is not really interesting in general, it can produce decent results when doing it with the right instrument activated, like it was done with the "French Horn" in Timelord (by Baudsurfer). Apart from just changing the instrument, let's also optimize a little bit on the size:
org 100h
start:
mov 	si,data			; init pointer for outsb
mov 	dx,330h			; change to data port
mov 	cl,5			; play our music data
rep 	outsb			; (see below at "data" label)
inc 	dx				; switch to control port
outsb					; change to mode "UART"
_wait:
mov 	al,[fs:0x46c]	; read timer value
cmp	 	al,bl			; wait until...
jz 		_wait			; ...timer value changed
xchg 	bx,ax			; save old timer value
in 		al,0x60			; check for ...
dec 	al				; ... ESC key
jnz 	start			; otherwise : repeat
dec 	dx				; switch to data port again
outsb					; stop all ...
outsb					; ... notes played ...
outsb					; ... on channel 3
data:
db		0c3h			; change instrument on channel 3
						; (is also "RET" for program quit)
db		60				; to "French Horn"
db		93h				; play note on channel 3
db		35				; deep "b" = note number 35
db		127				; play with volume = 127
db		3fh				; change mode to "UART"
db		0b3h			; control change on channel 3
db		123				; Channel Mode Message "All Notes Off"
↑ This is the previous example, with changed instrument, structuring the MIDI data into a data section, optimizing the output with the usage of outsb instead of out dx,al, and finalizing the program with a special command to turn All Notes Off. This is necessary for all instruments which don't stop by themself. In all the previous examples, we sent the "NOTE ON" command (9Xh), but not the according "NOTE OFF" command (8Xh). Also, the note is now played on channel 03h, since the commandbyte for changing an instrument on channel 3 is 0C3h which is also RET and can be reused. If this looks complicated at first, always remember, it's just sending defined commands to a single port.
The drum channel
Now, that you're aware that there are different channels (overall: 16) to play notes on, how would you like a channel 09h specifically for 'Drums' ? Ten different drumsets with dozens of samples are available out of the box. Per default, the "Standard Kit" is active. The following example plays a track of drum notes repeatedly, while further optimizing for size :
org 100h
aas						; 3fh = "set UART mode"
cwd						; 99h = "play note on drum channel" command
db 		42,38,42,35		; the drum notes (kick, snare, hihat)
mov 	dx,0x331		; MIDI Control Port
outsb					; send "set UART mode"
dec 	dx				; switch to MIDI data port
outsb					; send "play note on drum channel" command

main:
mov		al,[fs:0x46c]	; read timer
test	al,3
jnz 	main			; skip 3 values
inc 	byte [fs:0x46c] ; inc manually to prevent retrigger

inc 	bx				; increment note counter
and 	bl,3			; truncate to 4 notes
mov 	al,[bx+si]		; read the drumnote (see above)

out 	dx,al			; send the drum
mov 	al,127			; set volume to maximum
out 	dx,al			; send volume

in 		al,0x60			; check for ESC
dec 	al				;
jnz 	main			; no? repeat
ret						; otherwise quit
In contrast to the previous example, the data section is now at the start. That means, it's executed as code! This is dangerous of course, but also saves bytes on assigning the DATA offset to SI. Once outsb incremented SI initially two times, it is fixed and further reading from the drumdata is done with [BX+SI]. Unless you know exactly what you are doing, don't use that kind of "executing data" optimization!". In this special case AAS and CWD do no harm and the drum notes 42,38,42,35 are carefully crafted and arranged to resemble the instruction SUB AH,[232Ah] which does no harm either.
Creating basic sound effects in 16 bytes
In the MIDI repertoire, there are already some sound effects available. With the "data execution" optimization above, let's fire a gunshot in 16 bytes :
aas
les 	di,[bx-0x6C]
xor 	al,127
mov 	dx,0x331
outsb
dec 	dx
mov 	cl,5
rep 	outsb
ret
The first three instructions don't do anything (they do, but we don't care), it's just MIDI data.
-
aas
the command for switching to "UART" mode, for sending to port 0x331
-
les di,[bx-0x6C]
assembles to 0xc4 (change instrument on channel 4), 0x7F (change it to "Gunshot"), 0x94 (play note on channel 4)
-
xor al,127
assembles to 0x34 (play THIS note), 0x7f (play it THAT loud, 127 is also the allowed maximum)
The rest of the code basically just sends the MIDI data to the interface and exits. You can change the kind of sound effect with modifying the modbyte of the second instruction (change BX to BP or SI etc.). Changing the volume is more simple, change the byte value of xor al,127 to any value between 0 and 127.
Procedural MIDI music generation in 64 bytes
With all the above you should now be able to follow the next snippet Descent OST, a small framework for procedural MIDI sound generation in 64 bytes :
; "Descent OST", a 62 byte MIDI music player for MSDOS
; created by HellMood/DESiRE (C)2015
; this is the extracted music routine used in "Descent"
; it is a procedural MIDI algorithm which sticks a
; subroutine to the DOS timer (interrupt 0x1C)
; the registered routine is called ~18.2 times per second

; developed for use with "NASM",
; see http://sourceforge.net/projects/nasm/files/

%define		 	rhythmPattern			0b11
; with "rhythmPattern", you define how often a note is played
; generally, higher values and values containing many "ones"
; in binary representation, will result in faster play
; for example "0b11" will play every 4th note
%define 		baseInstrument			9
; defines the number of the first instrument used.
; see http://www.midi.org/techspecs/gm1sound.php for a full list
; keep in mind, that there are only a few instrument blocks
; whose sounds stop after a while. You won't get good results
; from strings etc. just a mess of overlayed sounds
%define 		numInstruments			7
; defines how many instrument are used. keep in mind, that "rhythm-
; Pattern" has influence on the picked instrument. the instruments
; from 9 to 9+7 are called "chromatic percussion"
%define 		noteStep 				5
; defines the basic difference from on note to the next. recommended
; values here are (mainly) 3,4 and 5 for music theoretic reasons
; but feel free to play around =)
%define 		noteRange				12
; after adding the noteStep, the note value is "mod"ded with
; the "noteRange". 12 means octave, which results in very harmonic
; scales
%define 		noteSpread				3
; the third step spreads the notes over the tonal spectrum, you may
; want to keep "noteSpread" * "noteRange" round about 30-60.
%define 		baseNote				40
; the general tone height of everything. some instruments don't play
; arbitrary deep notes correctly, and too high notes cause ear bleeding
; adjust with care ;)

; WARNING : after exiting the program, the timer interrupt is still active
; i strongly recommend to reboot or restart DOSBOX!

; ADVISE : Yes, there are music- and math-related things going on here
; if you're not into music theory, cycle of fifth, and the like, it maybe
; better to just play around with the parameters, rather then understanding them
; just change stuff slowly, and eventually you will get "there"
; wherever that is ;)

org 0x100
xchg cx,ax					; set our second counter to zero
mov dx,music
mov ax,0x251C				; mode "0x25" , "0x1C" = change address of timer interrupt
int 0x21					; see http://mprolab.teipir.gr/vivlio80X86/dosints.pdf
S:
in ax,0x60					; wait for "ESC" press, then exit
dec al						; music plays on anyway, this is just for
jnz S						; keeping the music exactly as in "Descent"
ret							; return to prompt
music:
inc bx						; increment our first counter (starts at zero)
test bl,byte rhythmPattern	; play a note every 4th time tick
jnz nomusic					; otherwise do nothing
mov dx,0x331
mov al,0x3F
out dx,al
dec dx
mov al,0xC0					; change instrument on channel 0...
out dx,al
mov ax,bx
aam byte numInstruments
add al,byte baseInstrument	; ...to this instrument
out dx,al
mov al,0x90					; play note on channel 0 ...
out dx,al
add cl,byte noteStep
mov al,cl
aam byte noteRange
imul ax,noteSpread
add al,baseNote				; ... play THIS note
out dx,al
neg al						; (play deeper notes louder = add bass)
add al,127+39				; ... play it THAT loud
out dx,al
nomusic:
iret
PC Speaker
Producing sound with PC speakers is incredibly easy. Basically, you set a system timer to a desired frequency, then connect this timer to the speaker. The PC Speaker Article from OSDEV Wiki has the details about it. An example for a tiny intro that uses PC speaker music is SpeaCore
Basic example with melody pattern
A very optimized and dirty variant of producing sound with the speaker is this 12 byte snippet (sound routine from the tiny intro "darkweb"):
hlt				; sync to timer1
inc bx			; increment our counter
mov ax,bx		; work with a copy
or al,0x4B      ; melody pattern + 2 LSB for speaker link
out 0x42,al		; set new countdown for timer2 (two passes)
out 0x61,al		; link timer2 to PC speaker (2 LSBs are 1)
jmp si			; rinse and repeat
Instead of sending low and high byte of our divisor directly in succession, we do it the "two path" way. That reduces the amount of possible frequencies to 255, which is still good enough for some rough sounds. Linking the timer to the PC speaker might not be obvious : Normally you would read the value of port 0x61, set the two least significant bits to TRUE and write the value again. You can save on all of this, if you just send the "two path" value which you just used for the timer if that value has the two least significant bits already set (or al,0x4B does this). Be aware that port 0x61 does many things apart from just connecting the timer to the speaker. A useful resource for ports in general is the Bochs Ports List, for port 0x61 it displays:
0061 w KB controller port B (ISA, EISA) (PS/2 port A is at 0092)
system control port for compatibility with 8255
bit 7 (1= IRQ 0 reset )
bit 6-4 reserved
bit 3 = 1 channel check enable
bit 2 = 1 parity check enable
bit 1 = 1 speaker data enable
bit 0 = 1 timer 2 gate to speaker enable
So if you experience strange things with highly optimized pc speaker output, revert to the safe way. The described way works with real hardware and DosBox. Unfortunately, both Orcacle Virtual Box with MsDos 6.22 and Windows XP NTVDM seem not to properly emulate PC speakers (Investigation and citation needed here!)
Simple deep sound in 8 bytes
One of the smallest possible PC speaker sound generation might be this 8 byte snippet :
dec ax			; AX initially 0000h -> AL = 0xFF
out 42h,al		; change divisor of timer2 to 0xFFFF
out 42h,al		; resulting in a very low frequency
out 61h,al		; 2 LSBs are set, connect timer to speaker
ret				; quit
(Note: This may fail on actual hardware, as there might not be time for the bus to settle between the consecutive out 42h,al statements.)
COVOX output (aka LPT DAC)
It is possible to output to an LPT-connected DAC ("COVOX") in a tinyprog. A proof-of-concept example is Express Train 125 which uses COVOX for sound generation.
This method follows the "audio from one line of C code" style of sound generation. A pouet discussion exists for more background information.


